
OK, this is for you, Jane, and anyone else who has to print on that 4 X 9 card stock that's often used for invitations and the like. I've posted my settings below. Remember how I said this is non-intuitive, so with your specific printer you may have to fiddle with the settings.
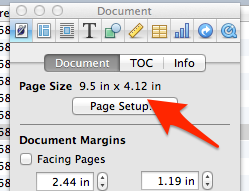
Here's where most problems start. The first tip off that printing is not working is if the Page Size is not consistent with the document you are printing.
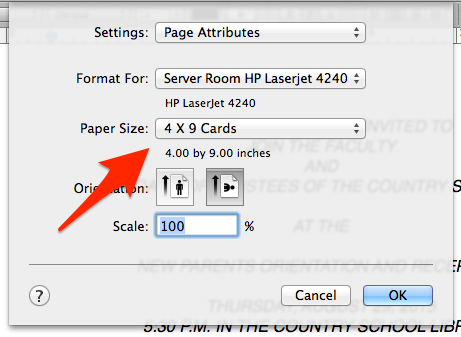
So we have to start here with "Paper Size". This shows the setting after I created the Custom Sized paper, yours will probably show "Letter" or something like that. You have to open this field so you can configure a Custom Size.
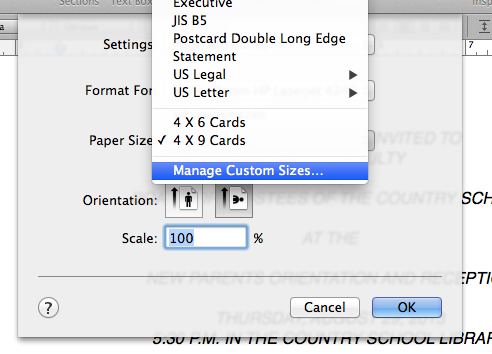
Select "Manage Custom Sizes.

This is how I configured the 4 X 9 custom paper. You'll first need to click the "+" button at the bottom left of the window to create a new entry. Then name the setting by double clicking on the default name that appears in the window. These are the settings I created. NOTE: the card stock is really 9" wide, but this is where the non-intuitive part comes in. Reverse the dimensions.

Once you click "OK you'll be back at this window - make sure you have the landscape icon selected. Otherwise your document will not look right when you return to Pages.
 |  Here's the rest of the settings for the document. Because of the logo on the left side of the cardstock, I changed the left margin to 3" and the right margin to 1" just to center the content a bit better. 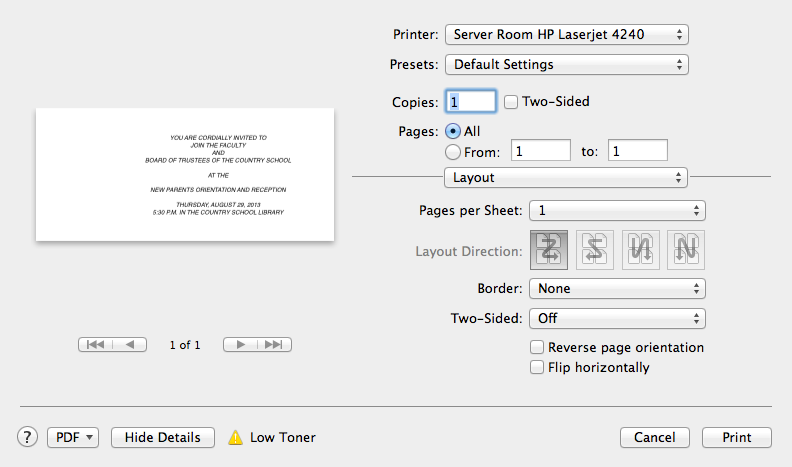 Here are the print dialog settings. You MAY want to change paper feed to Manual Tray. I did that and the printer required me to press a button for each copy. USUALLY if you just fill the Manual Try, the printer will pull from there first, so you don't have to press the button to print. |
 RSS Feed